(Translation in progress)
User manual for A.R.C.C.
- Part I: Quick Start Guide
- Part II: User Guide (to be translated)
- Part III: Advanced User Guide (to be translated)
Contents
A.R.C.C.
This guide aims at explaining how to use A.R.C.C., the Advanced Ryzom Content Creator. A.R.C.C. is a tool that allows to create scripts that will be interpreted by a web server and will interact with Ryzom's server.
Access
Folders and events
Open
As soon as login on, use finds a page offering access to various parts of the ARCC.
- Zone 1 allows you to navigate in this tree view.
- Zone 2 allows to create a new folder or a new event.
- The first field will contain the name of the object, preferably in English for common data, and preferably without accented or specific characters (â, ñ, ß...)
- The second fied is a list of values:
- Default value is Folder.
- Second choice, when reading down the list, is Event.
- The third and last field, add, is actually a button. Click on it to start the creation of the object. Notice that hitting the <Enter> key is equivalent to clicking the add button.
- Zone 3 contains the objects, folders or events, which have already been created in Zone 1 (here «house»).
Event
Zone 1 shows the place of the event in the folders tree view. Eack clickable link allows to go to the intended folder.
Creation field (Zone 2)
Zone 2 allows to create a new script or a new database.
- The first field will contain the name of the object, preferably in English for common data, and preferably without accented or specific characters (â, ñ, ß...).
- The second fied is a list of values:
- Default value is Script.
- Second choice, when reading down the list, is Database.
- The third and last field, add, is actually a button. Click on it to start the creation of the object. Notice that hitting the <Enter> key is equivalent to clicking the add button.
Tools (Zone 3)
Zone 3 contains two tools:
Parameters of the event
| Set-up |
Automated translations
| Automated translations |
Scripts (Zone 4)
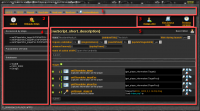
Zone 4 contains the scripts created in the event shown in zone 1 (here «New Event»).
The bottom part contains the meaning of the colored bullets appended to the scripts.
The middle part contains the list of the scripts associated to the event.
To each script is associated an ensemble of indicators and actions, listed here bellow as they appear from left to right. (to be checked with the English version of the screenshots)
- Script type:
| A simple script | |
| A linked script, meaning assigned to a NPC |
- Script status, shown as a colored bullet, which meaning appears in the bottom part of the window.
- Name of the script. Clicking on the name of the script allows to see and update the content, accordingly to the users rights.
- Name of the author who created the script.
- Possible actions on the scripts.
Databases (Zone 5)
| Zone 5 shows the list of the databases of the event. |
Script
- Zone 1 shows the place of the event in the folders tree view down to the event which contains the current scripts.
Eack clickable link allows to go to the intended folder.
- Zone 2 allows to test the script.
- Zone 3 allows to manage the source code and the history of updates.
- Zone 4 shows additional information about the running of the script.
- Zone 5 manages the actual creation of the script.
The quickest and least wearying method to create a script is to copy it from another one ressembling to what we want to produce. This method is very useful to create quickly a script that looks like another one, but you'll have to learn how to modify it sooner or later... otherwise, of which use would it be to have two script identical except for their names? That will be explaned in part II of the this user guide for ARCC.
Fill the new script.
Replay sequences 6 to 8 with «Script1»
- 6) open the script
- 7) show the source
- 8) show the source in Base64
Then, click in the already existing text (to place the focus) and select it all (for example: by hitting <Ctrl>+A on Windows and Unices) to replace it with the text saved in the clipboard (for example, by hitting <Ctrl>+V). Once the text has been replaced, save it:
Databases
- Player
- Global
- Civ
- Cult
- Organization (Faction)
- Other
- 3) Number of Rows
- 4) Content (emply when creating it)
- 6) A dataline (n°1) has been created.
- 7) A value (64) has been given to a column (Psi).
- 8)
| An icone at the bottom incates that the data can be modified manually. |


