| Line 4: | Line 4: | ||
=== FOR THE OBJECT === | === FOR THE OBJECT === | ||
| − | + | * preparing well edges for ingame usage ''([[Media:Outsider1.png]])'' | |
| − | |||
| − | |||
| − | * preparing well edges for ingame usage ''( | ||
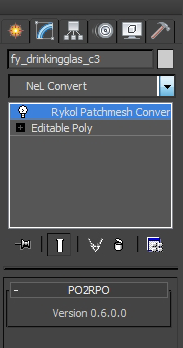
** select your object (you can always press (Z) to move the camera directly to your selected object) | ** select your object (you can always press (Z) to move the camera directly to your selected object) | ||
** go to 'Modify' > open dropdown list > select Nel Convert (this will add 'Rykol Patchmesh Convert') | ** go to 'Modify' > open dropdown list > select Nel Convert (this will add 'Rykol Patchmesh Convert') | ||
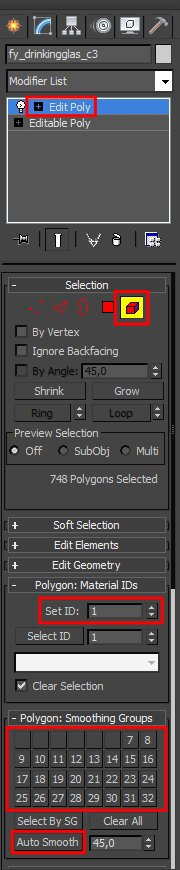
| − | * check for material ID ''( | + | * check for material ID ''([[Media:Outsider2.png]])'' |
** add 'Edit Poly' (not 'Editable Poly') from dropdown list, press (5) to enter the element mode, select all of your object (strg + a) and in the Meterial ID box the ID has to be between 1 and 100 in generell or it will not be supported well later, so change it to 1 when no mat ID is necessary | ** add 'Edit Poly' (not 'Editable Poly') from dropdown list, press (5) to enter the element mode, select all of your object (strg + a) and in the Meterial ID box the ID has to be between 1 and 100 in generell or it will not be supported well later, so change it to 1 when no mat ID is necessary | ||
| − | * auto smooth your object ''( | + | * auto smooth your object ''([[Media:Outsider2.png]])'' |
** (still in element mode and with everything selected) scroll down to 'Polygon: Smoothing Groups' and select 'Auto Smooth' with a generell value of 45,0 - if this won't work fine enough for your model, use the numbers of poly groups | ** (still in element mode and with everything selected) scroll down to 'Polygon: Smoothing Groups' and select 'Auto Smooth' with a generell value of 45,0 - if this won't work fine enough for your model, use the numbers of poly groups | ||
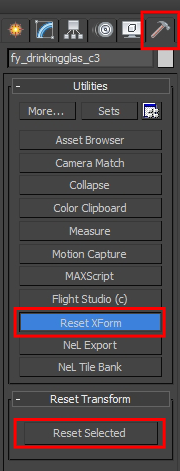
| − | * resetting XForm (this is important to export your model as a .shape later) ''( | + | * resetting XForm (this is important to export your model as a .shape later) ''([[Media:Outsider3.png]])'' |
| − | ** go to 'Utilities' (hammer icon) > Reset XForm > Reset Selected | + | ** go to 'Utilities' (hammer icon) > Reset XForm > Reset Selected |
| − | ** go back to 'Modify' (second icon) > Right click on XForm > Collapse All (this should now end in 'Editable Poly') | + | ** go back to 'Modify' (second icon) > Right click on XForm > Collapse All (this should now end in 'Editable Poly') ''([[Media:Outsider4.png]])'' |
| + | * You are done here :-) | ||
=== FOR THE MATERIAL === | === FOR THE MATERIAL === | ||
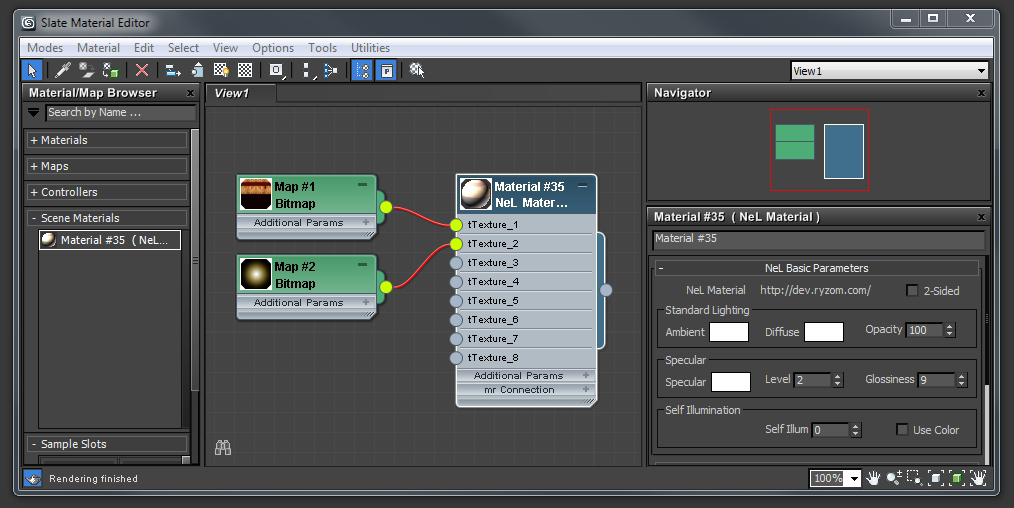
| − | (press (M) to open the material editor) | + | (press (M) to open the material editor) ''([[Media:Outsider5.png]])'' |
* right click in the view and add: | * right click in the view and add: | ||
** Materials > Nel Material | ** Materials > Nel Material | ||
After you imported your model succesfully inside 3ds max (i recommend fbx for imports) you have to do:
(press (M) to open the material editor) (Media:Outsider5.png)